source - http://www.serverintellect.com/support/ftp/add-ftp-account-iis6/
Creating the User Account
Right-click on My Computer and choose the ‘Manage’ option.
Expand the ‘Local Users and Groups’ section, and click the ‘Users’ folder.
Click on “Actions –> New User” in the file menu.
User Name: This is the exact user name which will be entered when connecting via FTP. For now, let’s name the user ‘ftp_access’
Full Name: This optional field can contain the user’s full name if the User Name is an abbreviation.
Description: This field can contain a description of what the account will be used for. This field is also optional.
Password: This will be your desired password when connecting. It must be entered twice for verification.
Set the password to never expire, leave the other options blank.
Click on Create.
Close the Computer Management window.
Set the folder permissions for the new user.
Right-click on the folder you need the user to upload to and choose ‘Properties’.
Click on the ‘Security’ tab, and then click on the “Add” button.
On the Select Users and Groups window, type in the User Name of the user we created, and click on ‘Check Names’, and then click ‘OK’.
You should now see the created user in the list of users with permissions for the specified folder. By default, the user will have the following permissions for the folder:
1
2
3
<li>Read</li>
<li>Read & Execute</li>
<li>List</li>
Highlight the user in the list and placing a check-mark next to ‘Modify’. The ‘Write’ permission is automatically selected when Modify permissions are granted, and click ‘OK’.
Navigate to ‘C:\Inetpub’ and add the user to the permissions list as outlined above. The default permissions are fine and the “Modify” permissions are not necessary.
Create an FTP Virtual Directory within IIS
Open IIS by navigating to ‘Start –> Administrative Tools –> Internet Information Service (IIS) Manager’.
Click the plus sign to expand the server name, and click on the efault FTP Site.
Right-click within the blank area beneath the existing accounts, navigate to ‘New –> Virtual Directory’, and click next.
Enter the exact user name for the user created previously, and click ‘Next’.
Click Browse and enter the path of the folder the user is uploading to, and click ‘Next’.
Place a check-mark next to ‘Write’, click ‘Next’ and then click ‘Finish’.
The FTP account is now created.
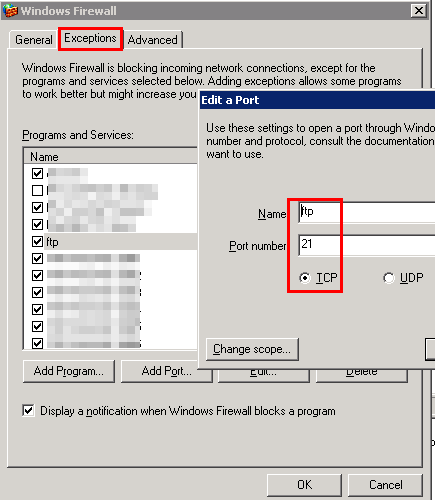
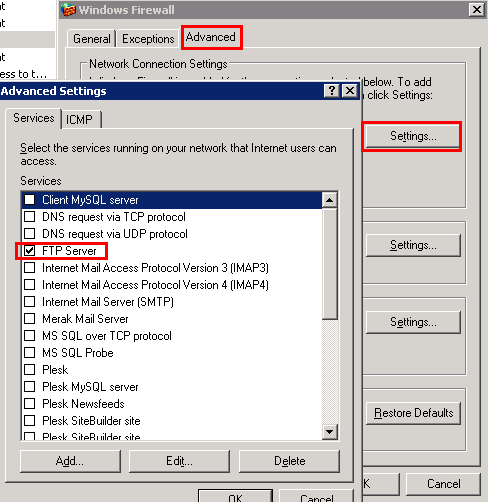
Firewall Rules


#iis
origin - http://www.pipiscrew.com/?p=3320 iis-how-do-i-add-a-ftp-account-to-iis6